Using a Microscope
Problem — How to use a microscope to observe elements too small to be seen with the naked eye, such as certain cells?
- Understand the purpose of the microscope in biology.
- Know the main parts of an optical microscope.
- Learn how to prepare a simple slide for observation.
- Learn how to adjust the microscope to get a clear image without damaging the equipment.
Part 1: What is a Microscope?
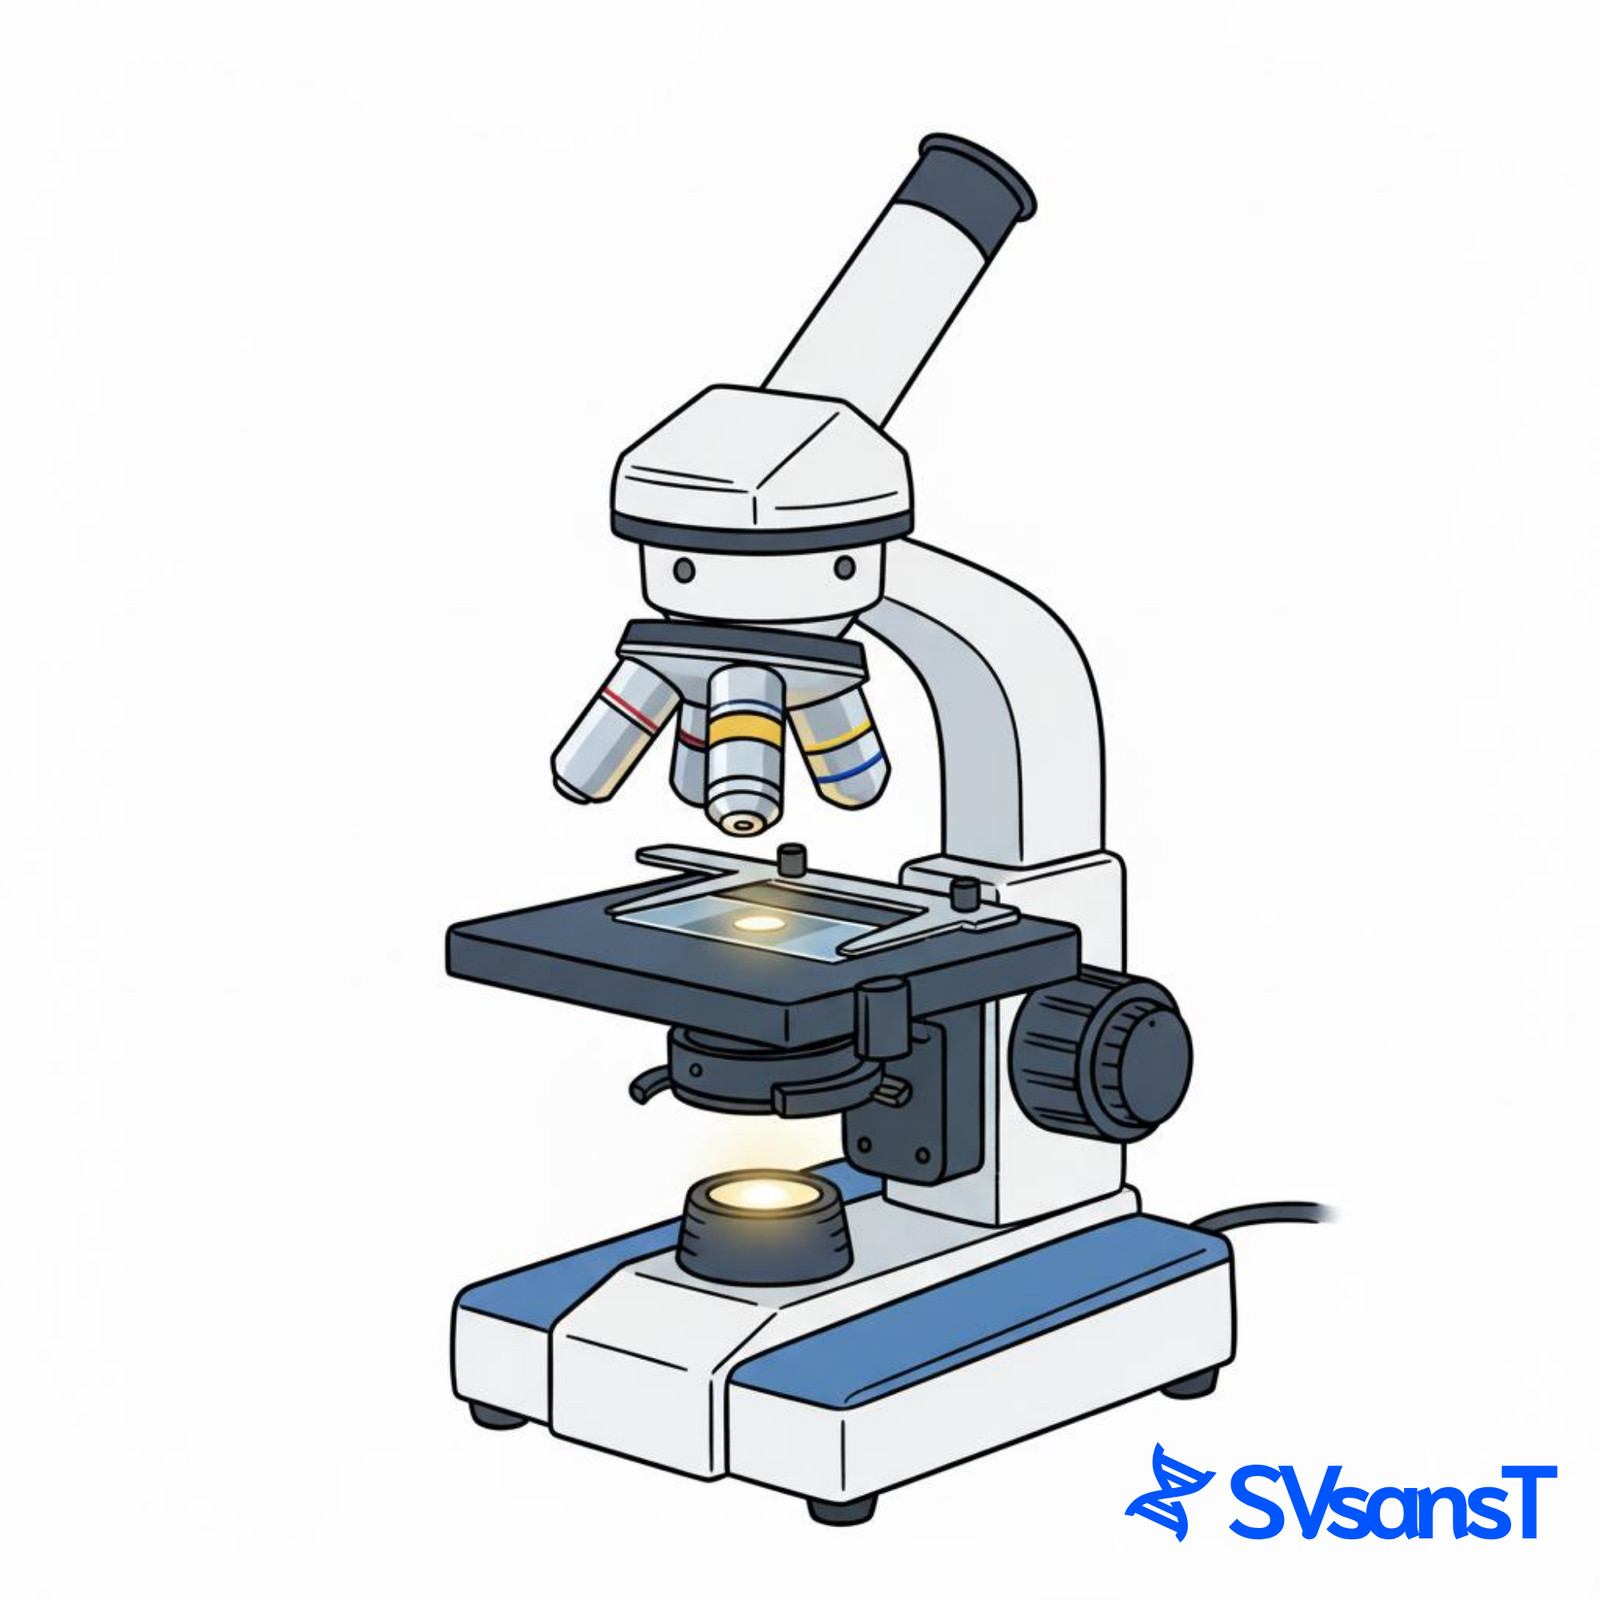
A microscope is an optical instrument that allows observing very small objects by providing an enlarged image. It is especially useful in biology to see elements invisible to the naked eye, such as certain cells or very small organisms.
The microscope has profoundly transformed life sciences. Thanks to it, scientists discovered that many living beings are made up of cells, and that the living world is not limited to what we can see directly.
Historical Landmarks
- 1665: Robert Hooke observed cork and used the word "cell" to describe the small visible cavities.
- 1670s: Antoni van Leeuwenhoek observed microscopic living beings in water and other samples.
- 19th–20th centuries: microscopes became increasingly efficient, allowing observation of finer details.
Why the Microscope is Essential in Biology
- To observe cells and certain tissues.
- To study very small living beings or living elements invisible to the naked eye.
- To better understand the organization of living beings.
- To carry out observations useful in health, research, and environmental studies.
The microscope is an essential tool for biology because it allows us to see what our eyes alone cannot. It played a major role in discovering the cellular world and understanding life. Without microscopes, studying many biological elements such as cells or some microscopic organisms would be impossible. This instrument has significantly advanced scientific knowledge.
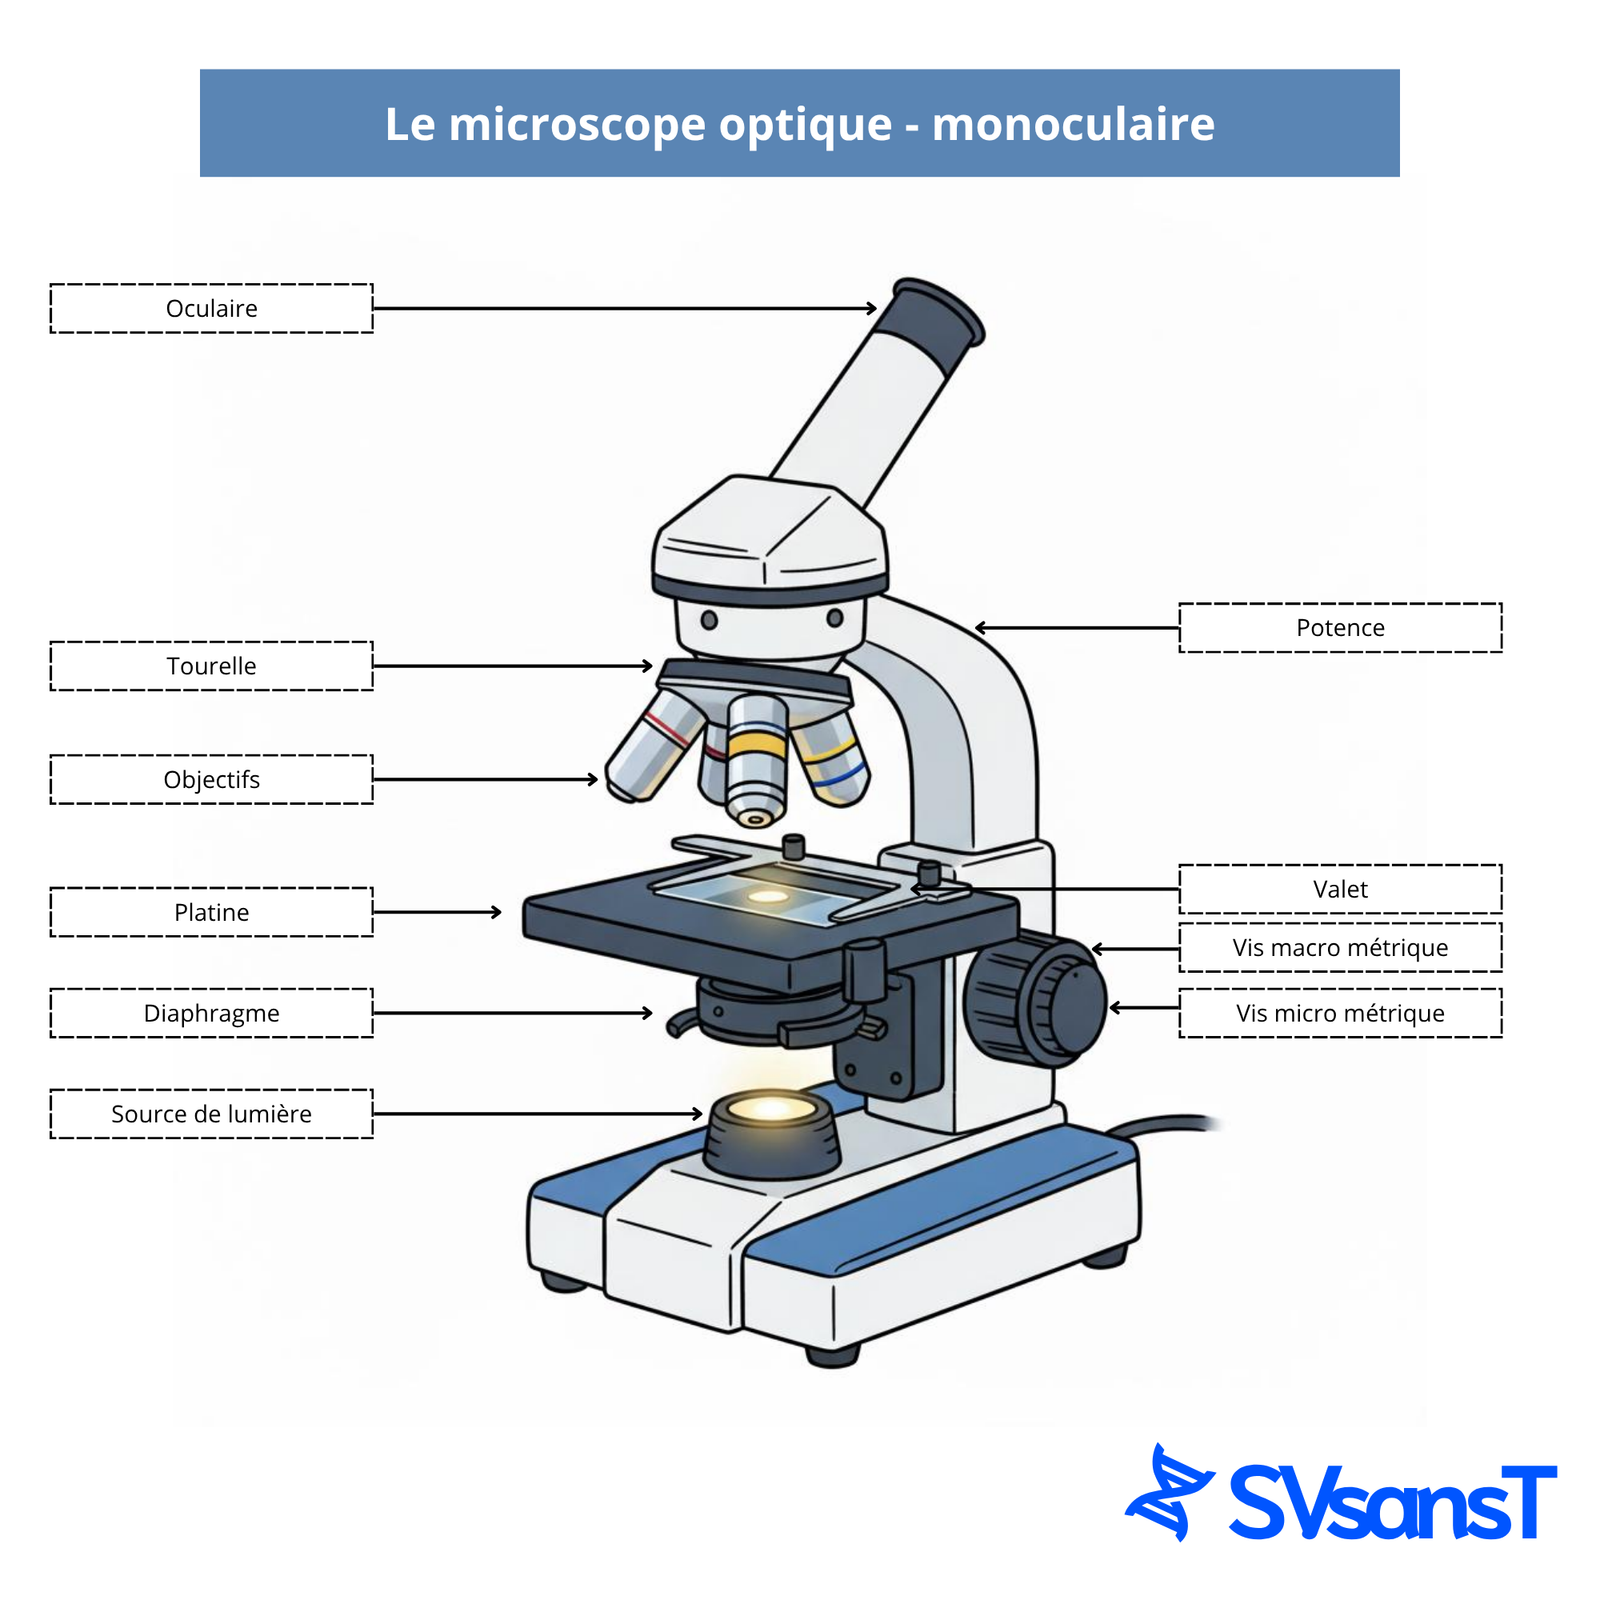
Part 2: Main Parts of the Microscope
The optical microscope consists of several parts. Each has a precise role to allow clear and sharp observation.
- Eyepiece: lens through which we look, often with 10× magnification.
- Objectives: lenses near the slide with different magnifications, often 4×, 10×, and 40×.
- Revolving nosepiece (objective turret): part that allows easy changing of objectives.
- Stage: surface where the slide to observe is placed.
- Stage clips: they hold the slide in place to prevent movement.
- Focusing system:
- Coarse focus knob: quick adjustment used to achieve initial focus.
- Fine focus knob: precise adjustment useful for sharpening the image.
- Light source: illuminates the slide to make the sample visible.
- Diaphragm: adjusts the amount of light passing through the sample.
- Arm: part used to hold and carry the microscope.
- Base: supports the microscope and provides stability.
| Part | Role | Note |
|---|---|---|
| Eyepiece | Lens through which we look. | Often 10× |
| Objectives | Lenses near the slide with different magnifications. | Often 4×, 10×, 40× |
| Revolving nosepiece | Allows changing the objective lens. | — |
| Stage | Support where the slide is placed. | — |
| Stage clips | Hold the slide in place. | — |
| Coarse focus knob | Quick focus adjustment. | Avoid at 40× |
| Fine focus knob | Precise focus adjustment. | Very useful at 40× |
| Light source | Illuminates the slide. | — |
| Diaphragm | Adjusts light quantity. | Should be adapted based on observation |
| Arm | Used to hold the instrument. | Carry the microscope with two hands |
| Base | Stabilizes the microscope. | Basic support |
A microscope is not just a simple magnifying object: it is a device made up of several complementary parts. The lenses enlarge the image, the light makes the sample visible, the stage holds the slide, and the focusing knobs help get a sharp image. Knowing each part’s role well is essential to use the microscope correctly, observe precisely, and avoid handling errors.
Part 3: Preparing a Slide and Observing
Steps to Observe a Sample
Prepare the slide
- Place a very small amount of the sample on a clean glass slide.
- Add a drop of water if the observation requires it.
- Gently place a cover slip on the sample to flatten and protect it.
Observe under the microscope
- Place the slide on the stage and secure it with the stage clips.
- Turn on the light and adjust the diaphragm to obtain appropriate brightness.
- Start with the lowest magnification objective, usually 4×.
- Looking from the side, slowly bring the objective close to the slide without touching it.
- Look through the eyepiece and first focus with the coarse focus knob.
- Then refine the sharpness with the fine focus knob.
- If increasing magnification, rotate the nosepiece and refocus especially with the fine focus knob.
Calculate magnification and estimate size
- Total magnification:
Gtotal = Geyepiece × Gobjective - Size on image or drawing:
Timage = Treal × Gtotal - Real size:
Treal = Timage ÷ Gtotal
| Conversion | Equivalent | Tip |
|---|---|---|
| 1 mm | = 1000 µm | mm → µm: ×1000 |
| 1 µm | = 0.001 mm | µm → mm: ÷1000 |
- Magnification: eyepiece 10× and objective 40× → 10 × 40 = 400×.
- Size on an image: if a cell measures 0.05 mm (i.e., 50 µm) in reality and is observed at 400×, then its size on a drawing or photo can be estimated at 0.05 mm × 400 = 20 mm, or 2 cm.
Tip: using the field of view
You can also estimate the size of an object by comparing its place within the observed field. For example, if the diameter of the field of view is 1.6 mm and the object covers roughly half of this diameter, its size is about 0.8 mm, or 800 µm.
Note: as magnification increases, the field of view becomes smaller. So you see a smaller area but with more details.
To succeed in microscopic observation, you must prepare the slide properly and follow a rigorous method. The sample must be correctly placed, light well adjusted, and observation should always start with the lowest magnification. Focus is done progressively and carefully to get a sharp image without breaking the slide or damaging the objective. The microscope also allows calculating total magnification and estimating the size of very small objects, making it a true scientific tool for observation and measurement.
Part 4: Tips and Precautions
- Always start observation with the lowest magnification.
- Do not touch lenses with fingers; use only appropriate optical cleaning paper if needed.
- Handle the slide carefully to avoid breaking it.
- At high magnification (40×), avoid using the coarse focus knob.
- Store the microscope with the lowest magnification objective in place.
- Cover the instrument or keep it dust-free after use.
- Carry the microscope with two hands: one hand on the arm, one under the base.
A microscope is delicate scientific equipment that must be handled with great care. Proper use not only improves vision but also protects the instrument, slides, and the user. Starting with low magnification, gently adjusting focus, never forcing the knobs, and carrying it properly are essential actions. By following these precautions, better observations are obtained and the equipment remains in good condition longer.
The microscope is a fundamental instrument in biology as it allows exploration of a world invisible to the naked eye. Thanks to it, we can observe cells, some microorganisms, and various living elements with greater precision. To use it well, one must know the main parts of the device, how to prepare a slide properly, and follow a rigorous observation method. Observation always begins at the lowest magnification, then focus is gradually refined. Handling precautions are also crucial to avoid damaging the microscope and ensure reliable observations. Mastering microscope use means learning to observe scientifically, with precision, method, and care.